To anyone who has just discovered the importance of networking and social connections, a social media account often seems the first step towards making new connections. A social media platform is indeed the best place in this digitally connected world to expose yourself and your talents to the world. And as far as making new connections and reviving old ones are concerned, no platform can provide the possibilities Facebook offers.

We all use Facebook to chat with friends, share photos, follow celebrities, and even buy and sell products and services on the platform. The vastness of Facebook in terms of the variety of services it offers is unmatched. It is no surprise that the platform is called a leader of social media platforms.
The services of Facebook offer a diverse range of benefits, yet they might not be the best option for everyone. The exposure you get on the platform is amazing, but what if you prefer reclusion? What if you don’t want strangers to see your personal photos on Facebook? What if you are more interested in using the platform more privately?
One way to practice privacy on Facebook is to hide your Facebook photos from as many people as you want. But can you do that? Can you hide all Facebook photos at once? Can you hide all your past and future photos you share on Facebook? All these questions require answers, and we will answer them for you now.
How to Hide All Photos in a Facebook Album
Step 1: Open the Facebook app and log into your account.
Step 2: Tap on your profile photo thumbnail near the top-left corner of the Home tab to go to your profile page.

Step 3: Scroll down a little through the profile page, and tap on the Photos button.
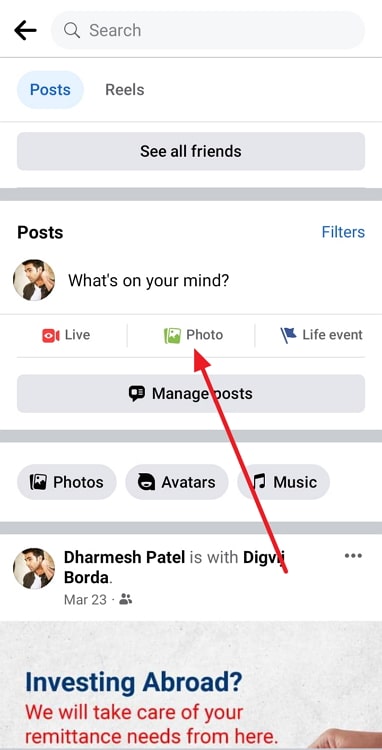
Step 4: You will see several sections on this screen, such as Photos of You, Uploads, and Albums. Go to Albums.

Step 5: Open the album you want to hide.
Step 6: Tap on the ellipsis at the top-right corner and select Edit.
Step 7: Tap on the audience mentioned below the description box. Change the audience to Only Me to hide the album from everyone. Or, you can hide the album from non-friends or some specific friends by selecting Friends, Friends except, or Specific friends.
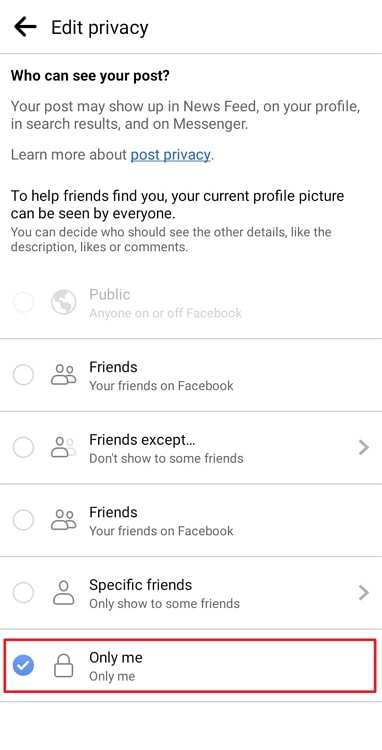
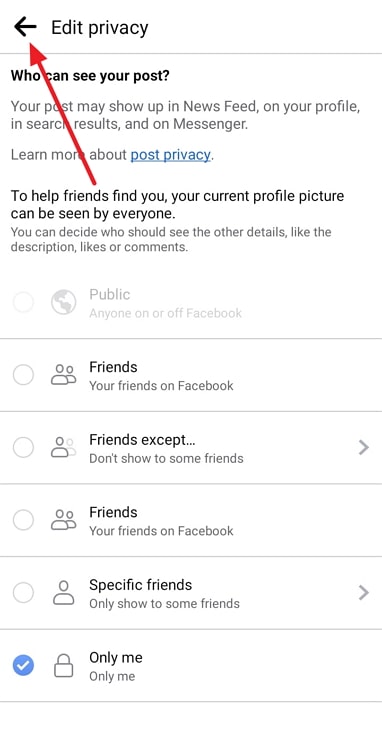
Step 8: Tap on the left-sided arrow (<–) at the top-left corner.
Step 9: Tap on Done in the upper-right corner.
How to hide all past and future photos on Facebook
Step 1: Open the Facebook app and tap on the three parallel lines at the screen’s upper-right corner to go to the Menu section.

Step 2: Tap on the Settings icon towards the far-left side at the top, just the left of the search icon.

Step 3: Scroll down through the Settings and privacy page to the Audience and Visibility section. Tap on Posts.
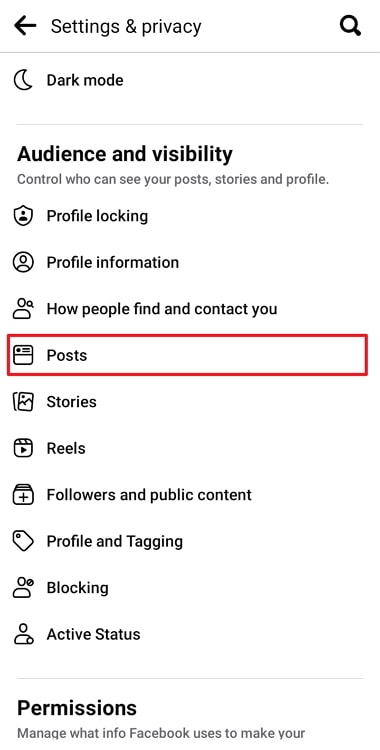
Step 4: Tap on Who can see your future posts to set the default audience for your future posts. Choose the option that suits you, and tap on the arrow at the top-left corner.

Step 5: Now, go to Limit who can see past posts, and tap on Limit Past Posts to change the audience of your past posts to Friends.

How to hide Facebook photos individually
If you want to hide some specific photos on Facebook, you can edit the privacy settings of the post that contains the photos. Follow these steps to do that:
Step 1: Open the Facebook app and go to your profile screen by tapping on your profile photo thumbnail in the home tab.
Step 2: Scroll down and find the post containing the required photo. Tap on the three dots at the top-right corner of the post.

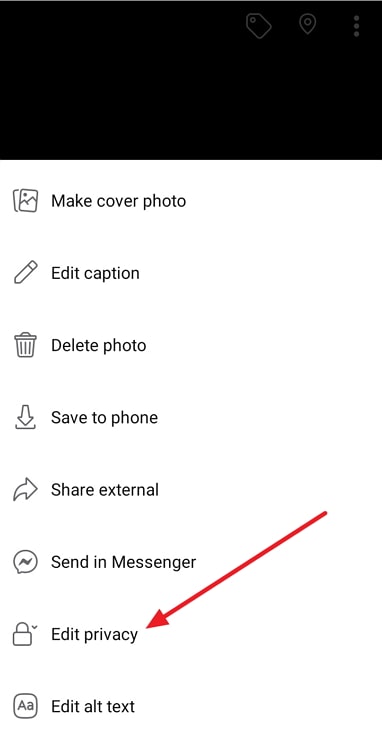
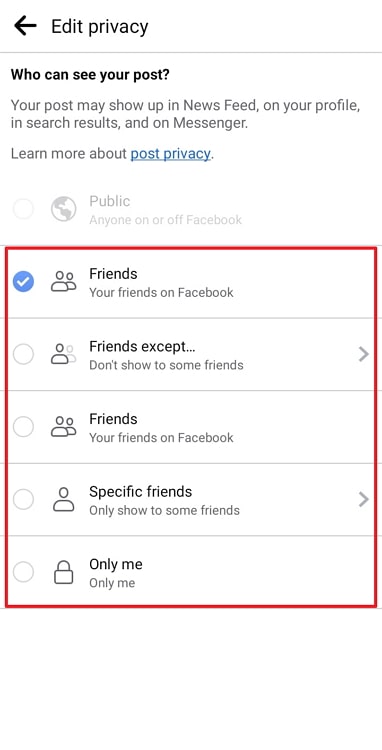
Step 3: Tap on Edit Privacy and select the option that suits you: Friends, Friends except, Specific Friends, or Only Me.
A Quick Recap
If you want to hide all your Facebook photos at once, you just can’t do that so easily. You can, however, hide most of your photos by following the steps mentioned in this blog.
As described in the blog, you can hide all the photos saved in an album at once. You can also toggle the privacy settings of your future posts to hide your photos from some strangers, some specific people, or everyone. The same can be done to individual photos. We have also described the case for profile and cover photos.
Like the blog? Make us more popular by sharing the blog with all your friends.
Also Read:


 Bitcoin
  Ethereum
  Tether
  XRP
XRP  Solana
  USDC
USDC  Dogecoin
  Cardano
  TRON
TRON