Get Rid of Category on Instagram: With the growing crowd on Instagram in recent years, the platform has become a magnet for all businesses, brands, influencers, and creators to attract customers/followers. To encourage the growth of these businesses and creators, the Instagram team has worked hard on the Professional accounts to help them reach their business goals on the platform.
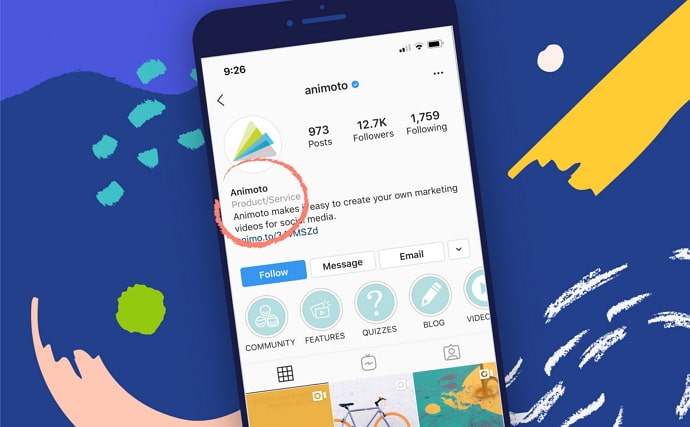
While there might not be too many differences between a private and a professional account on Instagram, someone who uses the app regularly would be able to tell them apart right away!
Wondering how?
Well, first, there’s the issue of the following count, which is generally over 5,000 of any decent business profile. Then there are other features like action buttons, business addresses, and, lastly, category labels.
In our blog today, we’re going to talk about these labels on Instagram, more specifically about how to remove, hide, and change them on your profile.
If you’ve felt stuck while doing these tasks in the past, stick with us till the end to learn how to remove category from Instagram.
How to Remove Category on Instagram
Step 1: Launch the Instagram app on your smartphone by navigating the mobile app’s icon in your device’s menu grid.
Step 2: From the home tab that you first land on, navigate to your profile picture’s thumbnail icon on the bottom-right corner of the screen and tap on it.

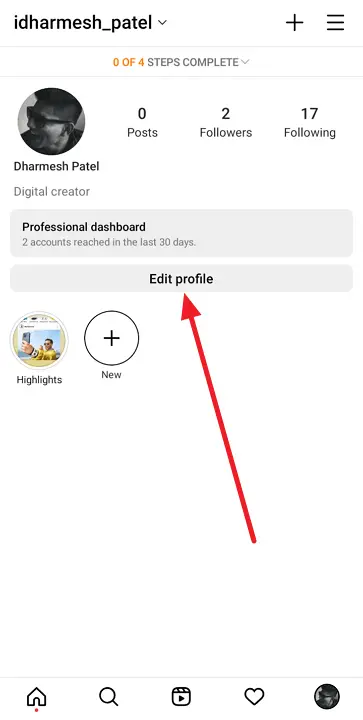
Step 3: Once you reach your Profile tab, below your profile picture, name, and bio, you’ll find a white Edit Profile button. Tap on this button.
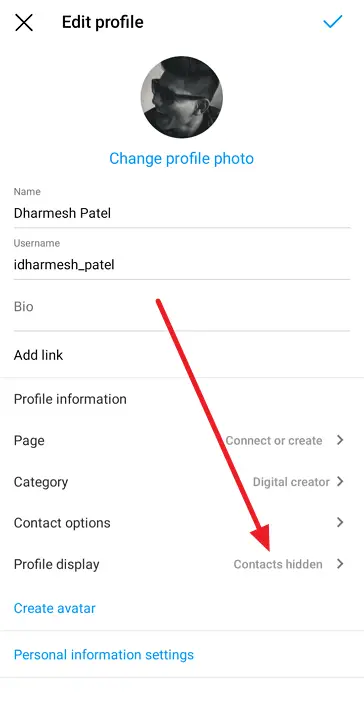
Step 4: Now, you can easily divide the Edit Profile tab into two parts: the first half contains fields like your name, username, website, and bio.
On the other hand, the second half has more to do with your Business information such as the details of your business page, the category of your business, its contact options, the Action buttons that you want to display on your profile, and so on.
The last option of this section is of Profile display, which determines what details are visible to others on your profile. Tap on this option.
Step 4: As soon as you do, you’ll be taken to a different tab: Profile display. On this tab, you’ll find two options with toggle switches next to both: Display category label and Display contact info.
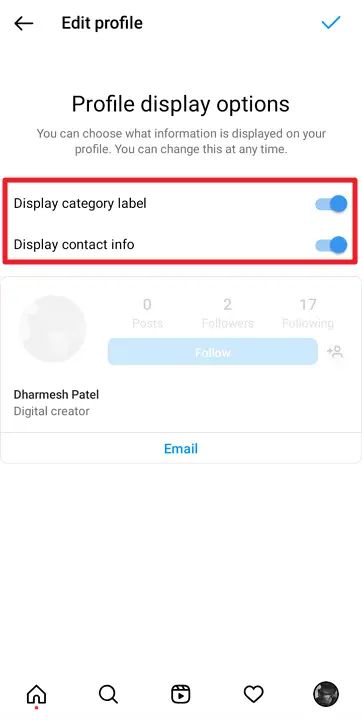
Step 5: Now, Instagram keeps these switches turned on by default. And in order to remove the category label, you’ll need to swipe left on the first toggle (Display category label) and then tap on tick icon (on Android devices) or Done button (for iOS devices) located at the top-right corner of the screen.
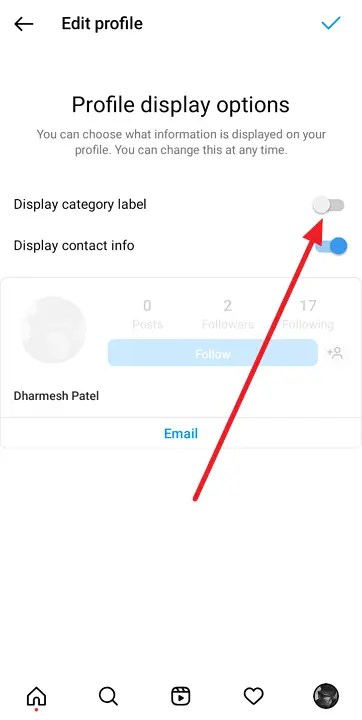
When you return to your profile now, you’ll notice the category label to have been disappeared from its rightful place under your/your company’s name.
Changing the category label on your profile: can that be done?
In the last section of our blog, we walked you through the process of hiding the category label from your profile. But what if you don’t really want to hide that label and are simply trying to hide it because you picked the wrong one while creating your profile? Here’s a piece of good news for you: these labels can also be changed just as easily as they can be hidden. And if you’re unfamiliar with the process of doing that, allow us to help.
Because the answer to this problem also lies in your Edit Profile tab, we’ll need to ask you to refer to the step-by-step guide given above and follow steps 1 and 2 from there to land here.
Step 3: Once you’re on the Edit Profile tab, navigate the second option under the Public business information section, which would be named Category.
In The End:
Let’s quickly revisit everything new we’ve learned today. We began by learning that while the category label cannot be removed or deleted from a professional account on Instagram, it can certainly be hidden from your profile, the steps for which have been provided above.
Later, we also looked into how you can change this label as well. If our blog has helped you, we’d love to know more about it in the comments section below.
Also Read:




 Bitcoin
  Ethereum
  Tether
  XRP
XRP  Solana
  USDC
USDC  Dogecoin
  Cardano
  TRON
TRON